On This Page (back to: APM Accelerator Order Management)
This guide walks you through replacing the included demo data with your own SAP data, so you can move the accelerator into productive use.
- Set the Data Set Connection
- Adjust the Parameters
- Delete the preloaded (demo) data
- Extract source data from SAP
- Data Load
Switch to Your Own SAP Data – Step 1: Set the Data Set Connection
- Navigate to Data → Datasets and select the relevant created data set.

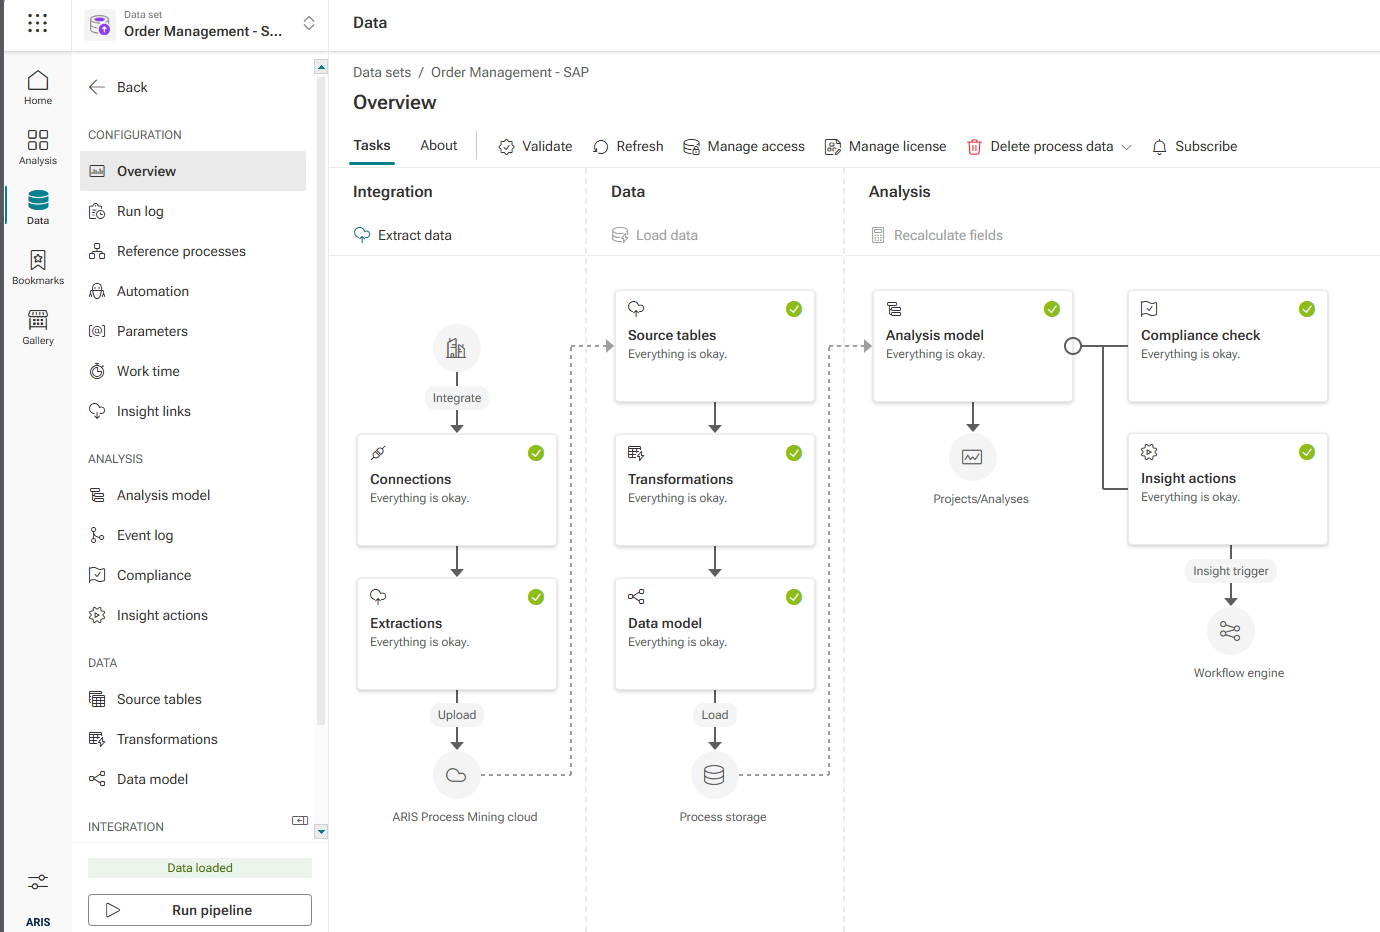
- After opening the data set, the Overview tab provides a summary of the current data load status (and lists any detected issues)
- On the this page, scroll down in the left-hand navigation to the Connections section.
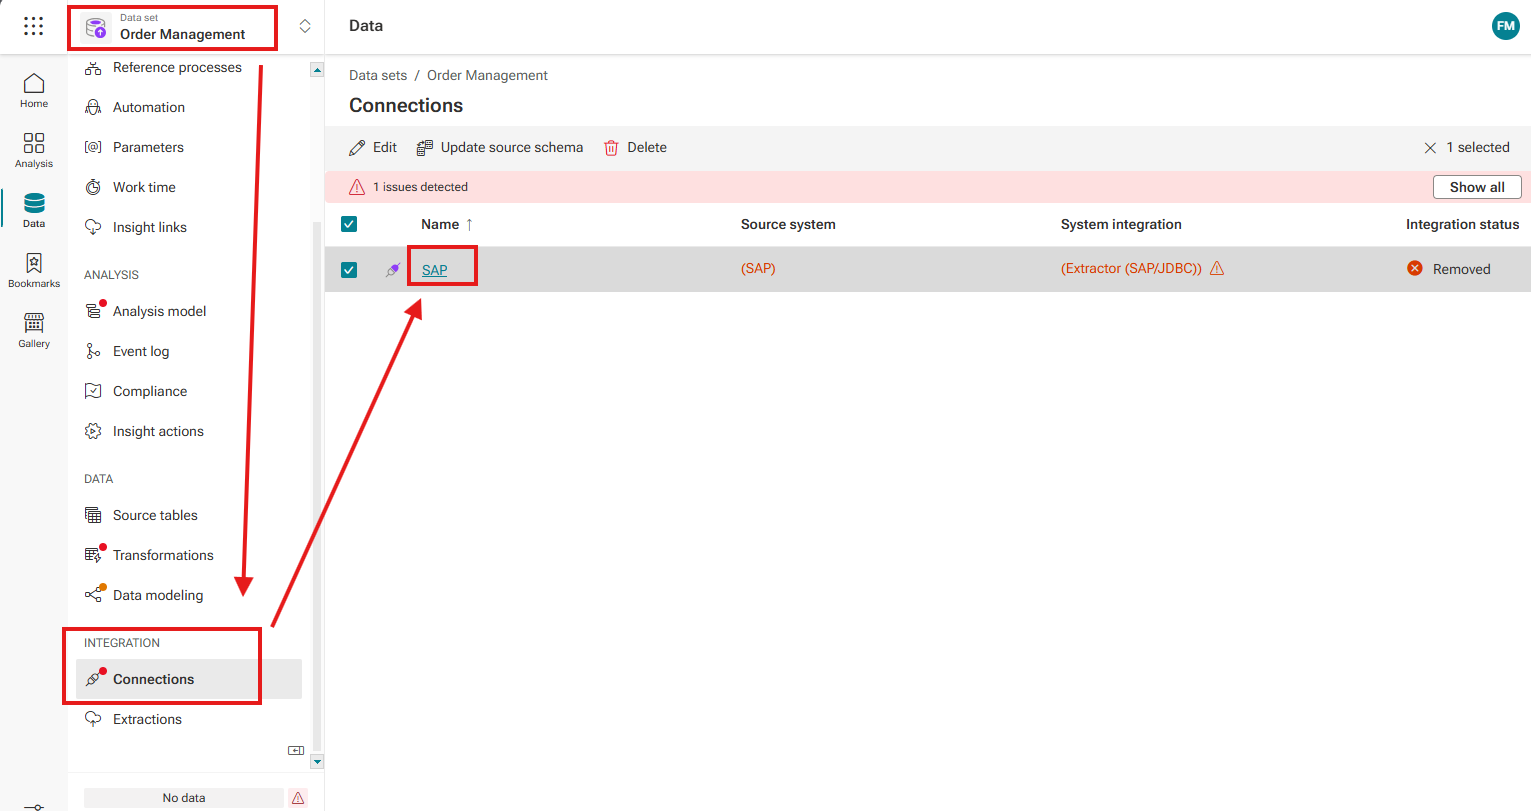
- Select the existing entry labeled SAP.
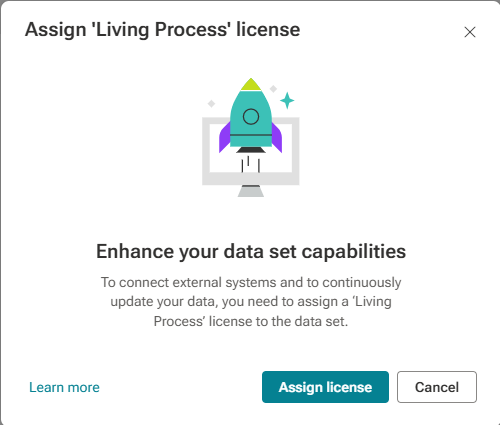
- If no Living Process license has been assigned yet, you will be prompted to assign one at this point.
- Select the SAP system integration.
- Select the provided Process Extractor.
(The extractor must be installed and correctly configured beforehand; see chapter: Preparation and Prerequisites.) - Select the corresponding SAP source system.
-
Enter the Client Secret Key.
(The Client Secret Key is either provided by the administrator who set up the system integration or, if sufficient permissions are available, can be retrieved manually as described in the Excursus below)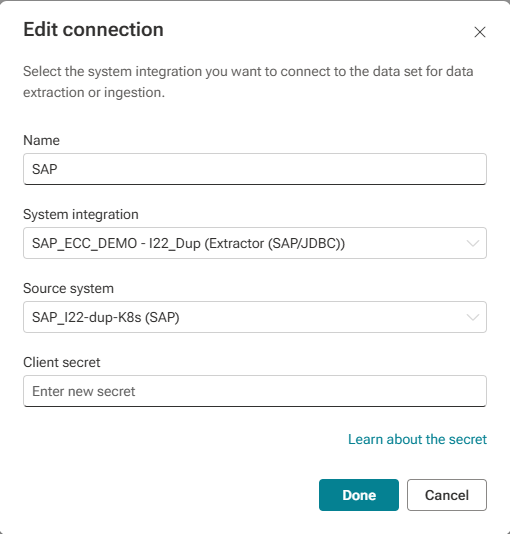
Excursus: Retrieving the Client Secret:
-
Step A:
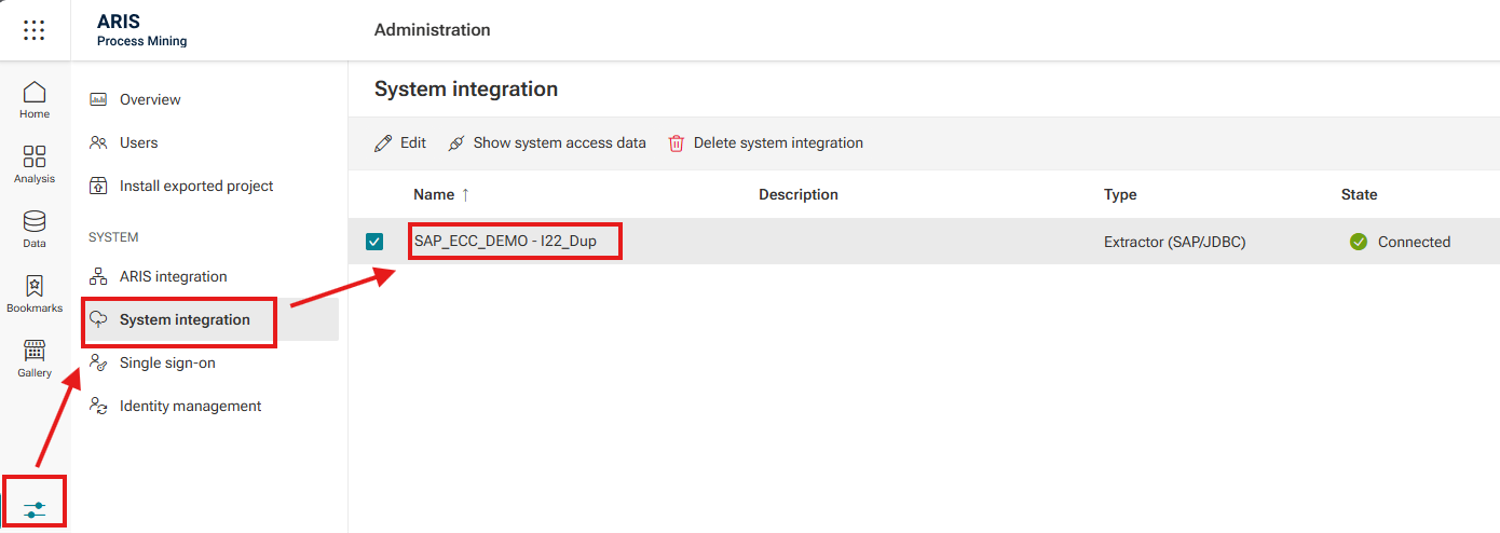
- Step B:

Switch to Your Own SAP Data – Step 2: Adjust the Parameters
Details will coming soon!
Switch to Your Own SAP Data – Step 3: Delete the (preloaded) demo data
- Go to the relevant data set's Overview tab.
- At the top, select Delete process data > Choose Delete process storage data.
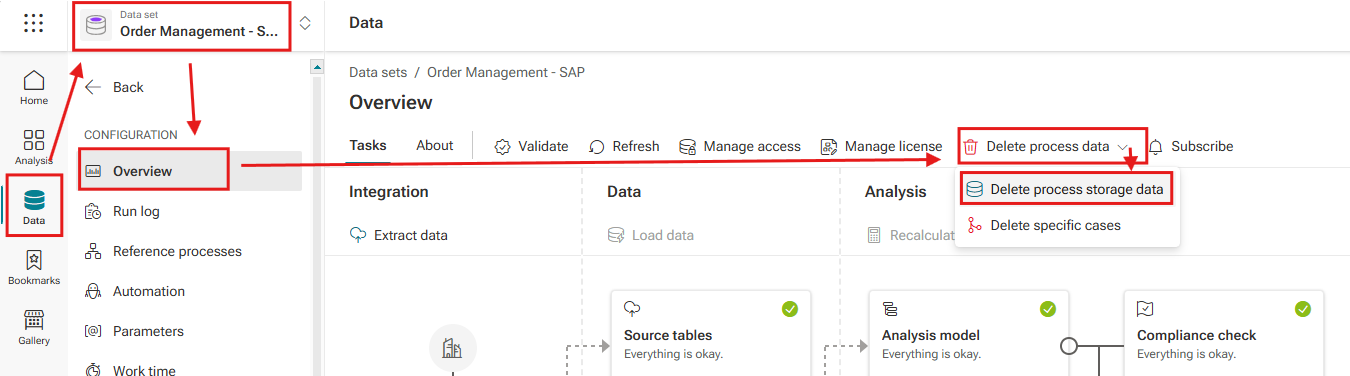
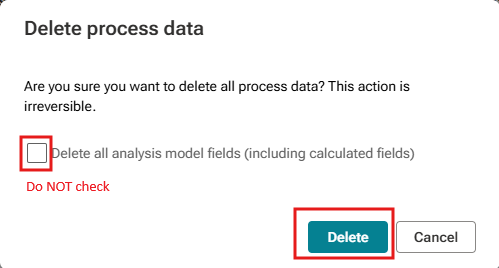
A dialog titled "Delete process data" opens, asking you to confirm that all process data will be deleted (irreversible).
- Do not check the option "Delete all analysis model fields (including calculated fields)" — the analysis model must be preserved.
- Select Delete to confirm.
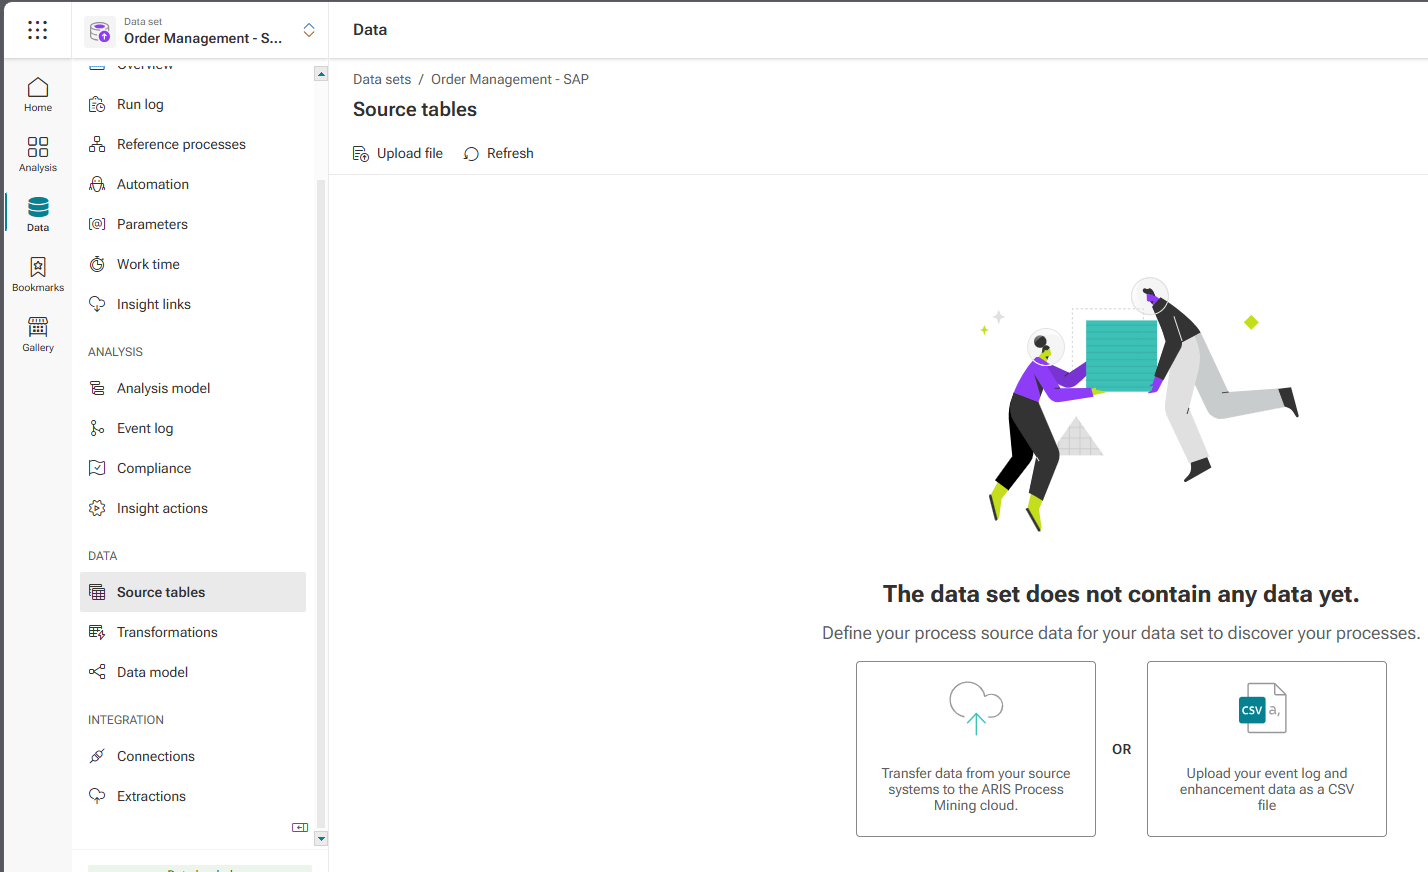
Next, go to Source Tables in the left-hand navigation and delete tables listed there.
before:
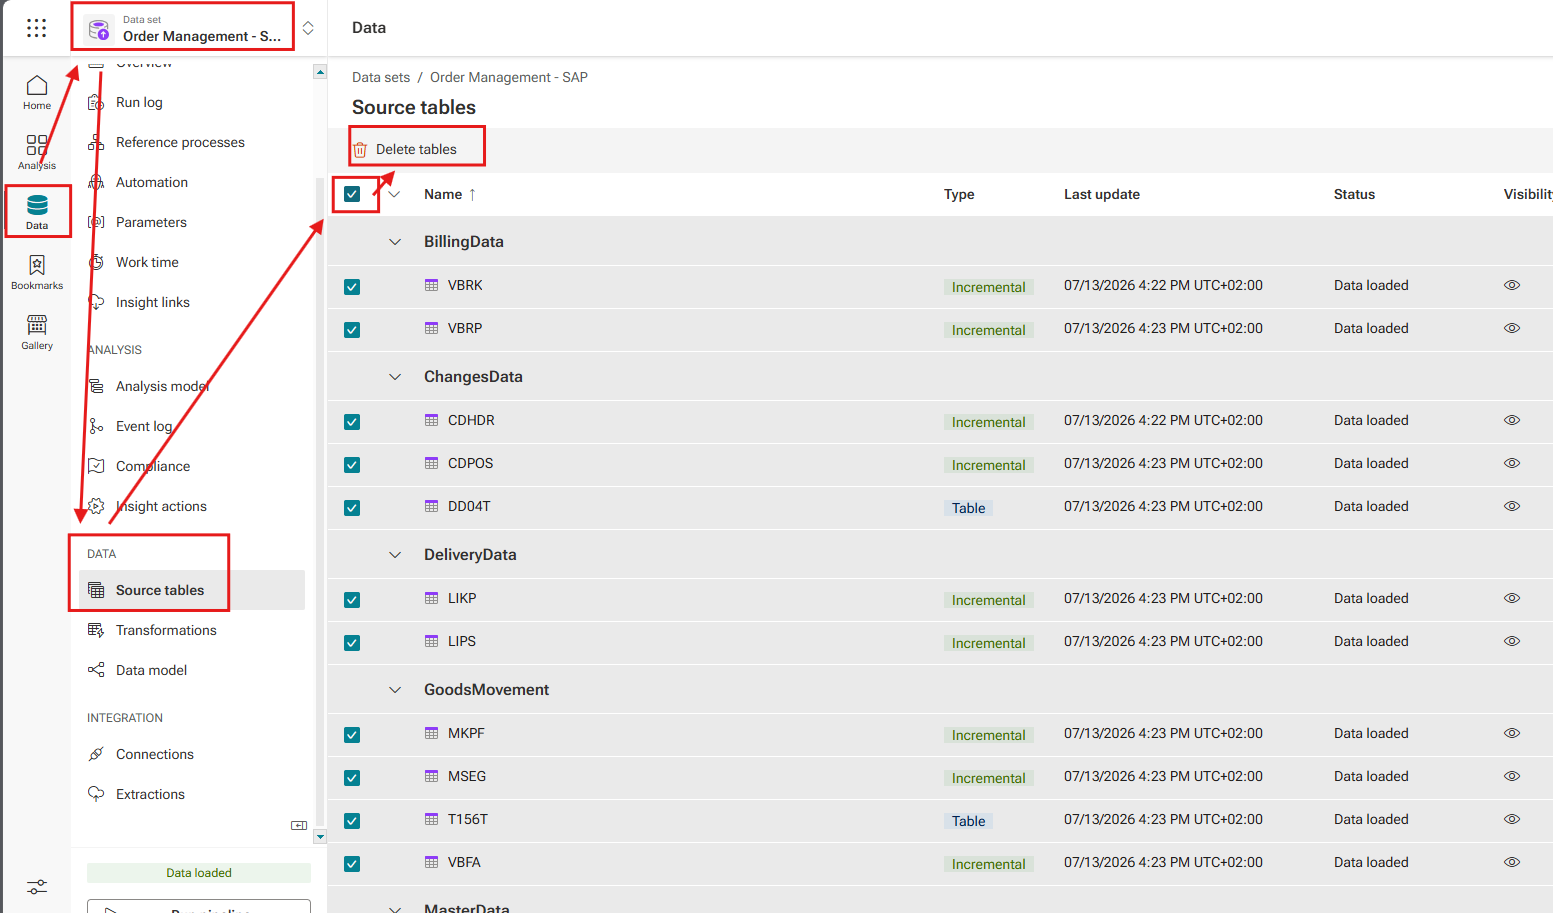
afterwards you will get
Switch to Your Own SAP Data – Step 4: Extract source data from SAP
- Navigate to Extraction in the data set area and select Extract all. (Alternatively: you can trigger it on the Overview panel as well)
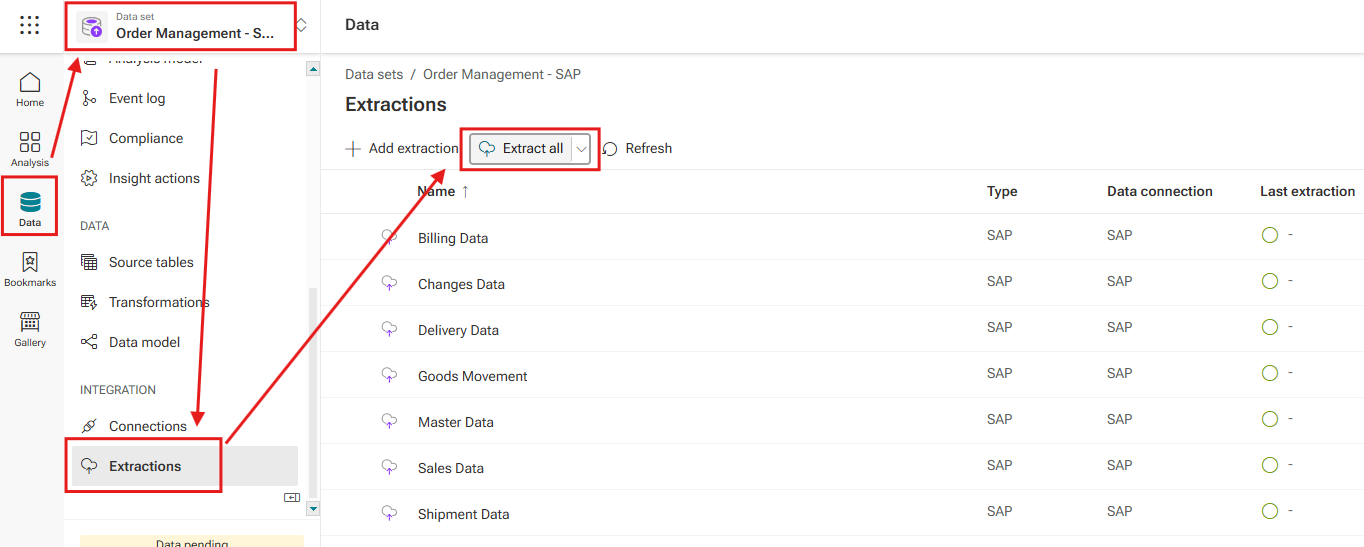
- In the dialog that opens, select Run to start the extraction.

- Depending on the data volume, this step may take some time (even hours). The extraction status can be monitored in the Run log area.

Switch to Your Own SAP Data – Step 5: Data Load
After the data extraction is completed, the source tables must be loaded into the data set.
- Return to the Overview tab of the data set and select Load Data. (Alternatively, you can do it in the Source tables panel)
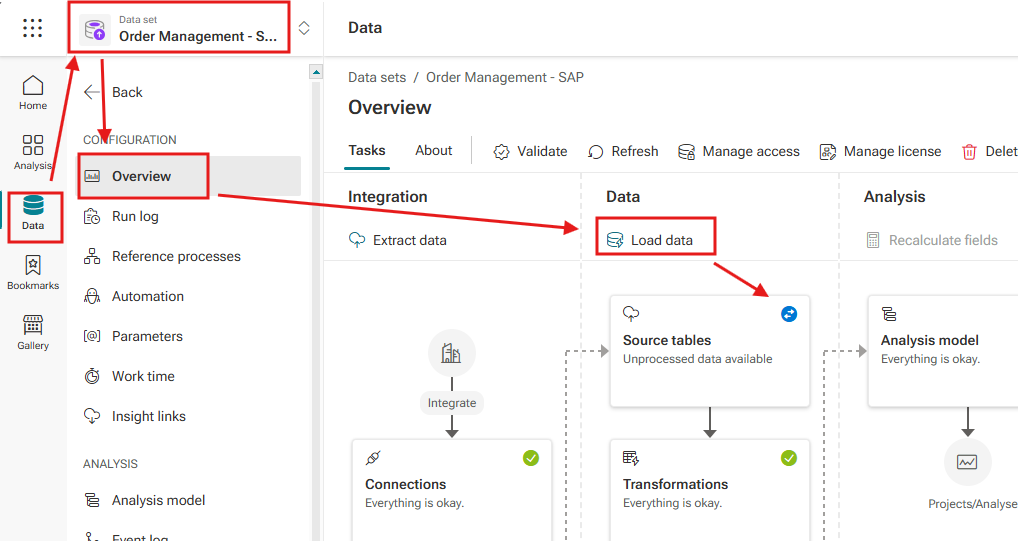
- Keep Update dynamic parameters after data load selected.
- Select Run to start the data load.
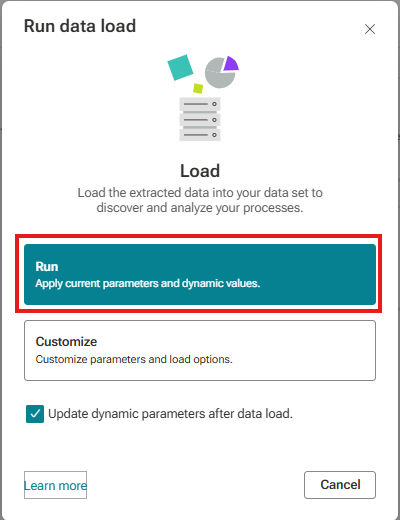
- The data load status can be monitored in the Run log area again.
Once extraction and data load have completed successfully, the Overview tab will show green checkmarks across all steps (Connections, Extractions, Source tables, Transformations, Data model, Analysis model), each confirming "Everything is okay." — indicating your Accounts Receivable accelerator is now running on your own productive SAP data.