On This Page (back to: APM Accelerator Order Management)
This guide walks you through installing the accelerator with its included demo data, so you can explore a fully working solution right away.
If you plan to connect your own SAP data, make sure to also review Prerequisites & Preparation beforehand. Once you're ready to move to productive use, see Switch to Productive Data.
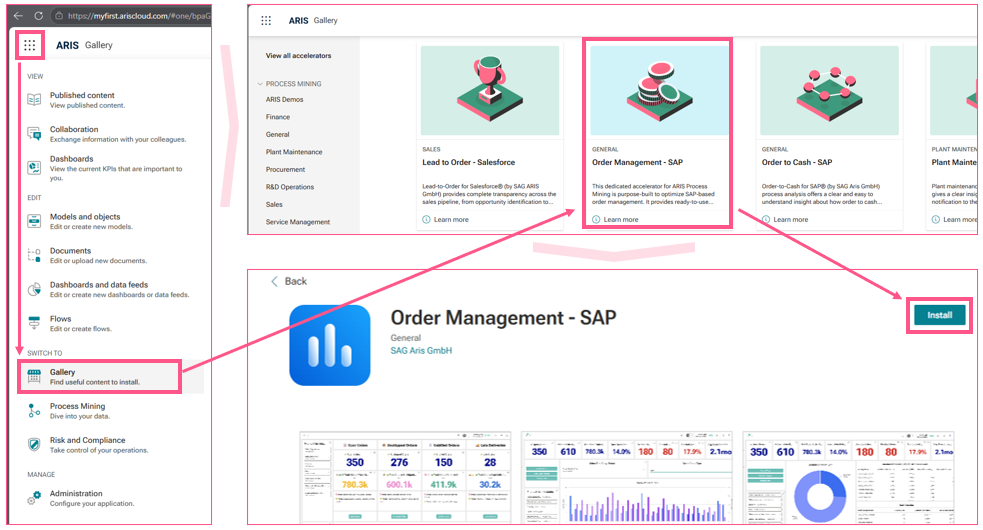
Starting via the ARIS Gallery:
- Open the Gallery area in your ARIS Process Mining project space
- Locate the right accelerator tile (like in the screenshot, e.g. Order Management - SAP)
- Select Install
Starting the manual import:
For the manual installation, the accelerator is provided as a single .apms file. This file contains all components of the solution and, in this case, also includes demo data (labeled as Source Data during the import).
- Open the Administration area in your ARIS Process Mining project space
- Navigate to Install exported project
- Upload the .apms file

After the file has been uploaded, an overview pop-up opens, showing the accelerator's description, dashboard previews, and highlights.
- Select Install to proceed.

Installation Wizard
From here, the steps are the same regardless of how the installation was started.
Configure Import – Step 1 of 4: Select Source Data
On the next screen (Configure import), ensure that all checks are selected.

Configure Import – Step 2 of 4: Choose Your Project
Next, define which project the accelerator should be installed into:
- Select Create project.
- Enter a project name (e.g., Order Management) and, optionally, an abbreviation, appearance color and a project description.
- Define the right Owner.

Configure Import – Step 3 of 4: Set App Parameters
Review the accelerator-specific app parameters. For the demo data, these come pre-filled with default values, as shown below.
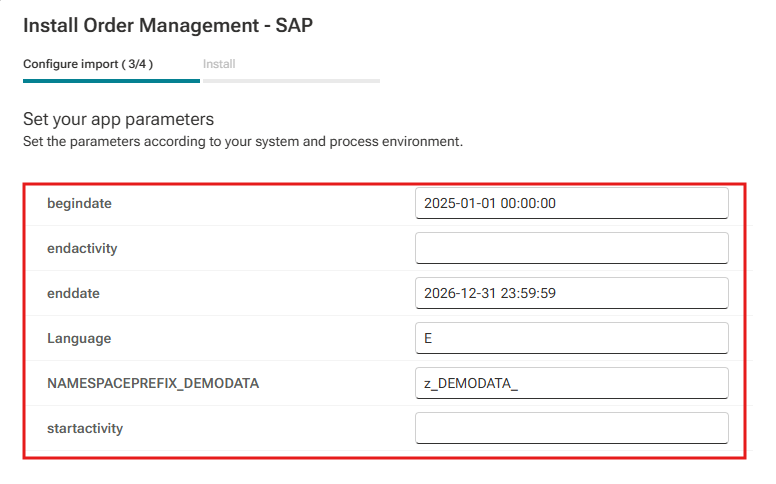
- Select Next.
Configure Import – Step 4 of 4: Choose Your Data Set
Finally, define where to install the data set:
- Select Create data set.
- The data set name is pre-filled (e.g., Order Management - SAP).
- Assign 'Living Process' license – leave this disabled for the demo data.
- Define the Owner.
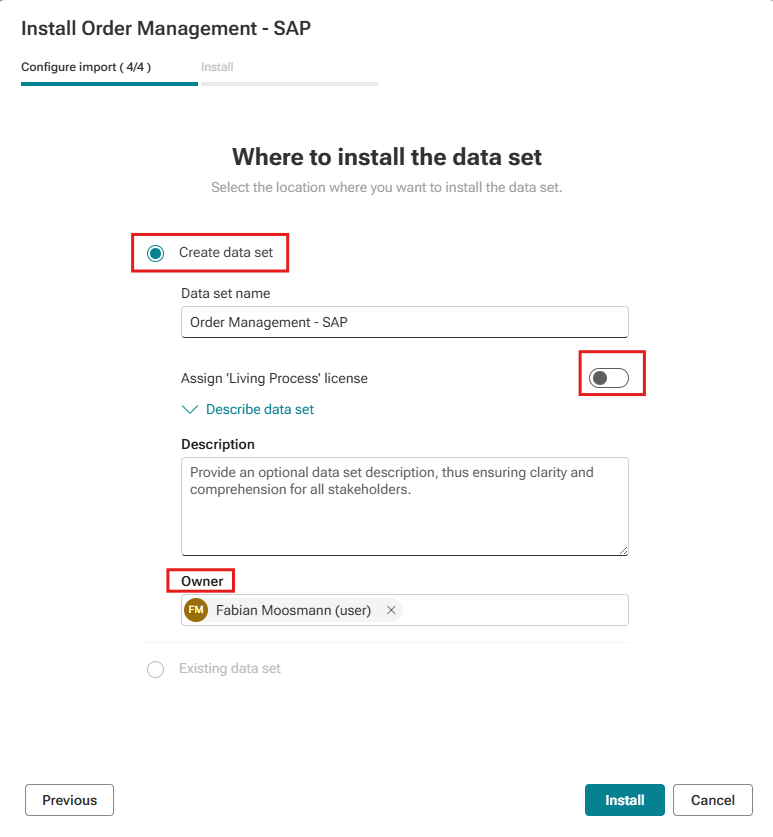
Select Install to complete the installation.
The installation itself is usually quick. The demo data import takes the longest and can be tracked via the Run log. (More info here APM Help – Run Log)
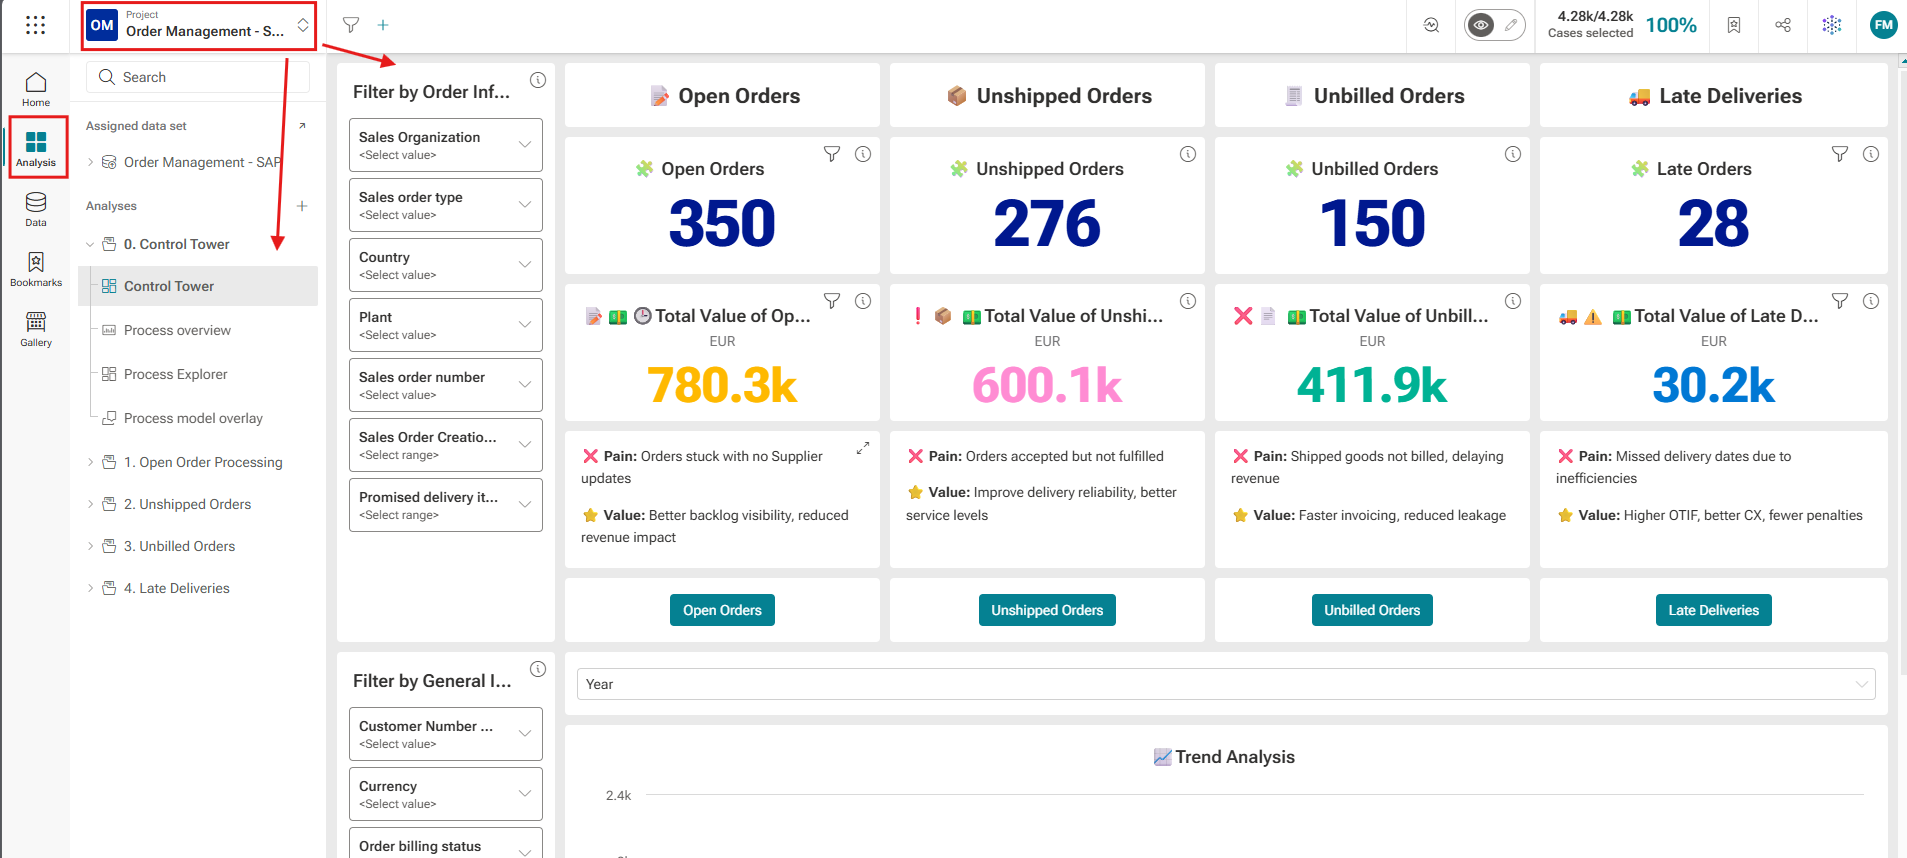
Once the installation is complete, the accelerator can be used right away with the demo data. Simply go to Analyses, select the corresponding project, and you'll land on the start page.
- Start the installation by selecting Install and wait until all assets are successfully installed.

The Result
Once the installation is complete, the accelerator can be used right away with the demo data. Simply go to Analyses, select the corresponding project, and you'll land on the start page.
Need Help?
If you have questions about any Accelerator or want to exchange experiences with others, visit our community forum. There you can ask questions, share insights, and support each other.