The release of MashZone 2.1 is approaching and we are going to publish a series of articles that contain the new posts. Today, I'd like to start with a simple introduction to the Google Maps feature. This post is based on my previous Google Maps example and thus, has the same requirements. To recreate the example you need a Professional or Enterprise license and a API key generated by Google.
To start, we need a document to save the address in. I have selected a Google Docs document, because the support for it is also a new MashZone feature and will be described in detail in another post.
First, create a new data feed.
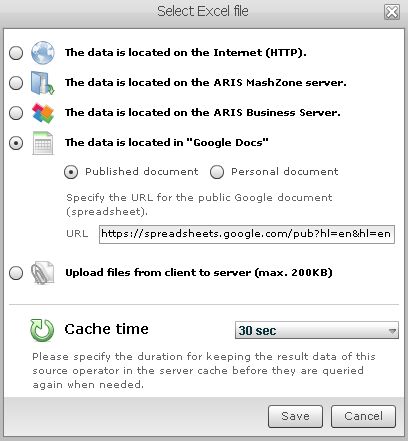
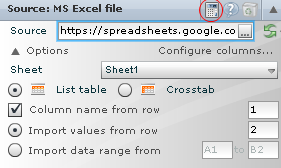
Then, select your Google Docs document as a source, in this case, in Excel format. If your data is confidential, you can restrict the access to Google Docs to specific people.
After the address was imported, you can output the table as a test. The result will look like this:
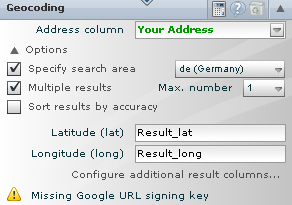
In the next step, open the area Column values and select the "Geocoding" operator. Now select the column in "Address column" where the addresses are output. In this example that is "Your Address".
When you open the option you are given three possibilities for influencing your search results. "Specify search area" allows you to restrict the search results to a specific country. The next check box allows you to minimize the number of identical entries and the last option allows you to sort according to the accuracy of the results.
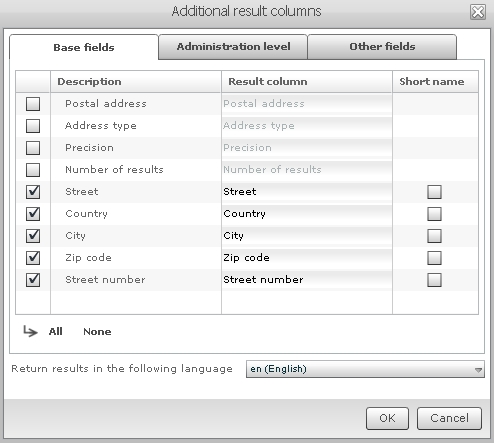
In the following, we will create the columns needed to determine the longitude and latitude. MashZone defines these by itself, they can however be renamed, if necessary. "Configure additional result columns" allows you to display all the information in one column. This has the advantage that you can optimize entries for filtering. Thus, it is possible to filter according to street, zip code, city or country.
Google limits the standard API key to 2,500 queries per day. This is noted directly in the Geocoding Operator. If you generate more queries per day, you need a premier key that lifts this resctriction.
Finally, connect Geocoding with the output and you will receive the following results:
Now switch to the Composer and create a Google Maps map. If you select it you will see that new functions were added. First, however, switch to the Layers tab.
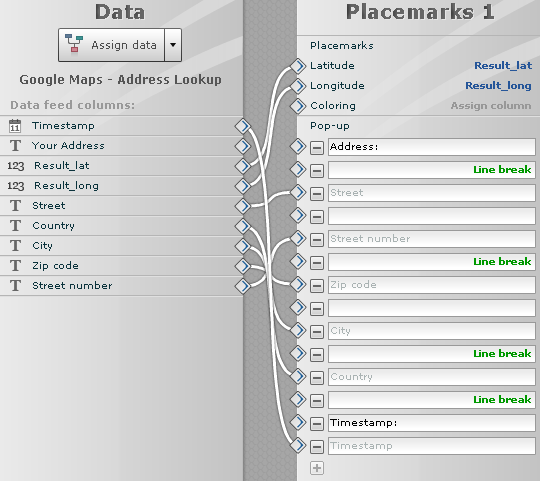
Next insert a placemark by clicking on the button marked red in the above graphic. After you have set the blue marked selection to Placemarks you can switch to the data assignment feed. Connect the latitude and longitude values there. In addition, I have created a description pop-up with the address, in order to assign it to the position again.
Here is the final example:
For a live effect you can here enter an address, in order to see the direct determination of the location. To prevent constant access to the Google Server, a short cache time is used so don't be surprised if an entry is not shown directly.
Note: Make sure to also learn about the other new features available in MashZone 2.1!

