In the last part, we took a look at how to setup a ARIS Connect Configuration with git and what's the advantages of such a system. Now in the second part we take a look at how to use it for comparison and documentation.
Prerequisites: You should have read part one and ideally know how to use an IDE (integrated development environment) especially VSC (Visual Studio Code). How to install VSC and install the gitlens extension will not part of this post, but it is shown in the reference links below.
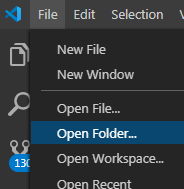
How to open your git folder
In VSC you are able to either open single files, but it's also possible to open complete folders as a kind of project. In the last part, we created a git repository by executing the git init command. To allow VSC to find all the information git provides, the same folder needs to be opened. Internally it works, because git saves all of its data inside of a hidden .git directory, that is also placed in your init directory. VSC and gitlens now recognize this folder and shows the git information automatically in addition to the folder content.
Show local changes
What was shown in the last article with the git command line can now be done easier with the IDE. In the GitLens section (after you installed VSC and the plugin) you can find the same information as with the "git status" command (see lower arrow). You can see which files are currently changed and not yet committed. In this case the hierarchy.xml file is an ongoing change. As soon as you select it (see upper arrow), a new comparison window opens, that show the differences between you local version and the version in the git repository.
![]() Git Lense Icon in Visual Studio Code
Git Lense Icon in Visual Studio Code
In the comparison tool (diff tool) both versions are shown and the changed lines are highlighted. Removed lines are marked with red and added lines green. If a line was only changed, the right panel also highlights the changed parts (see top_cap2 in the screenshot).
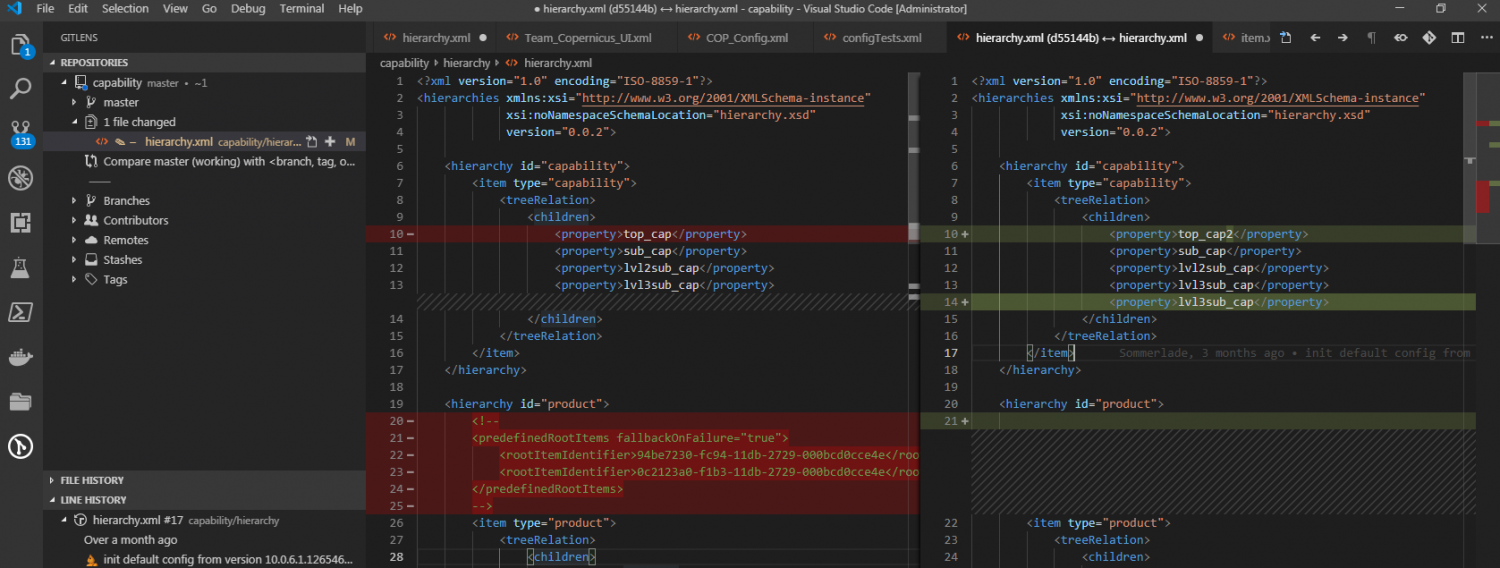 Compare editor highlights the differences between 2 Versions.
Show former changes
But it's not only possible to see the current changes but also the former list of changes. If you open the current branch (in this example "master") you can see the complete list of committed changes with their change description and the files within this change list. If you select a file here, the comparison tool opens again and shows the changed version together with the version before that change.
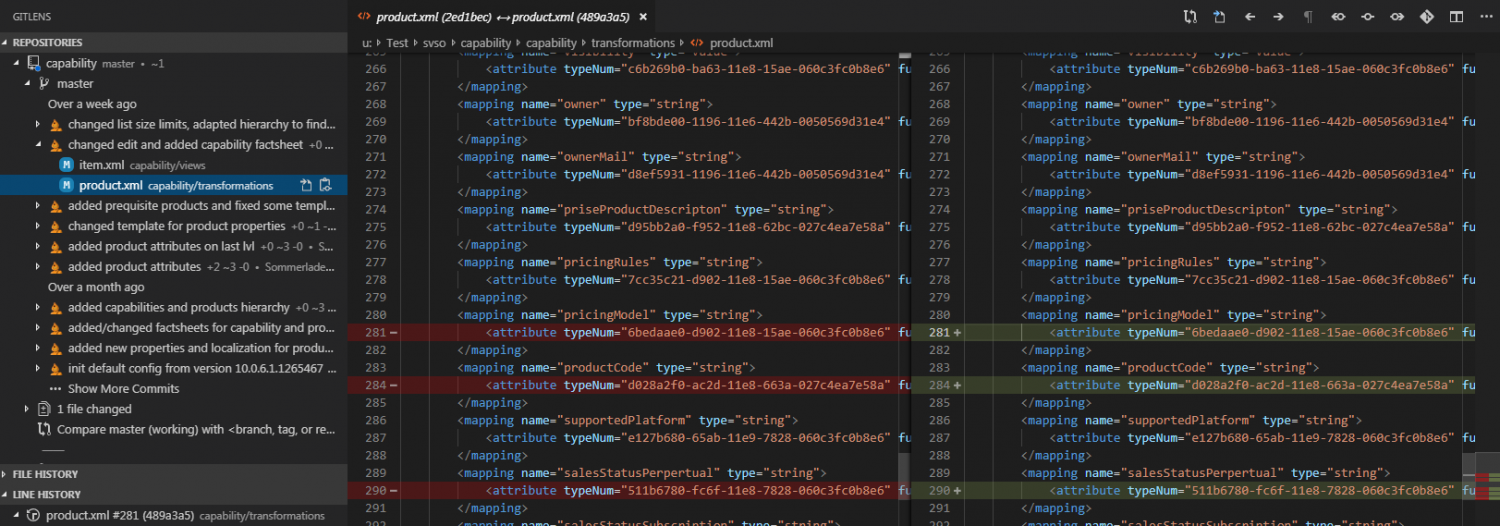 Committed changes in the branch with description and file list. The example change contained of 2 files item.xml and product.xml and the description was "changed edit and added capability factsheet"
So you are able to navigate through your changes and see why some changes were made (if your commiting message was explanatory enough) and you can even take a closer look at file comparison directly.
Show differences
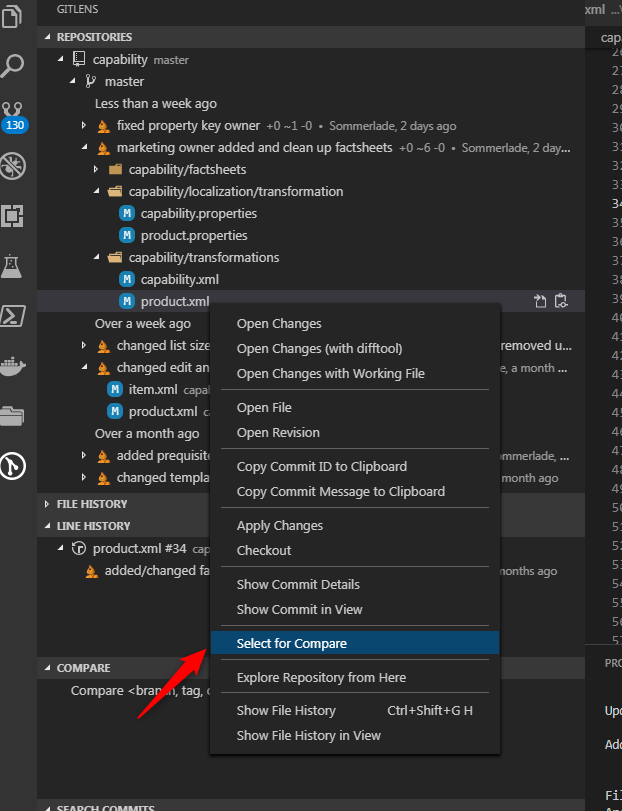
Sometimes you also need to see the difference between files from multiple commits at the same time and not only compare it to its former version. For this use case there is a functionality to select one file for compare and then choose the compare target. It is a built-in capability of VSC, but can also be applied in the GitLens Panel for selecting former versions of a file.
To use it, you open the context menu of a file (via right click) and then choose "Select for Compare". After that, the selection of another file (or file version) does not open the usual text editor but again the comparison tool.
Add and Commit
Besides the visualization of differences in VSC, it is also possible to applying changes to the repository via UI. To access the git add/reset and git commit command you need to select the source control panel, which is a VCS built-in tool and does not need the GitLens Extension.
Inside of the panel you are able to change the stage (meaning git add/reset) of single files or alternatively of all files together.
 Change stage of a single file: product.xml
To commit all staged changes, you just need to add the commit message in a text box and press Ctrl+Enter.
 Text area for entereing commit message
Command line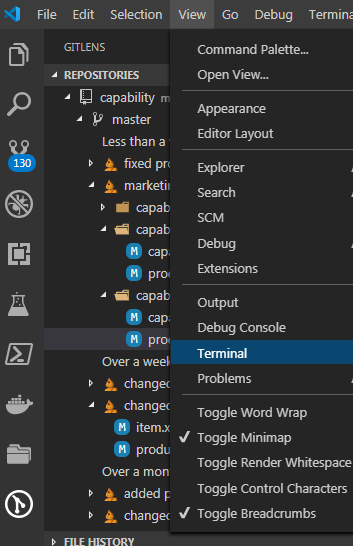
And the nicest thing (at least for us developers) in VCS is that you don't lose your command line. It just has it built in and it can be switched on and off via menu or shortcut (Ctrl+` or see cheat sheet link below). So you still can use the usual git commands while also having a great text editor.
VCS does use the same git information as the command line, the UI always synchronizes with the changes you made via command line. So it doesn't matter if you execute a git add/reset or click the "Stage Changes" button in the UI. It is all reflected in both: git status and UI state visualization.
Summary
With these capabilities you are now able to create a new customizing, make changes to it and hand it over to colleagues. It also helps you, when you need to recreate specific changes to other customizings, because you are able to see every single change and it's reason. If you work together in a team and multiple people has worked on the customizing, you even can trace back who did a change at a specific point in time (but for this scenario I would really recommend to have a central repository instead of just local folder, e.g. github).
References:
https://code.visualstudio.com/ Free IDE with great git support https://marketplace.visualstudio.com/items?itemName=eamodio.gitlens advanced git visualization extension for visual studio code https://code.visualstudio.com/shortcuts/keyboard-shortcuts-windows.pdf VCS shortcut cheat sheet https://github.com/ public central git repository https://www.freecodecamp.org/news/understanding-git-basics-commands-tips-tricks/ further reading understanding git


Clear Writing on
Thank you for this!