
After the first two articles explained the difference between the use of the WYSIWYG editor and ARIS scripting, as well as the structure of report script templates, I now present the first tutorial on how to create reports via the WYSIWYG editor using a simple report to output content of a group.
How to iterate over a group
In this tutorial, you want to iterate over a set of groups and output the name of the models contained in those groups. First, you select “Group” as the context while creating the report. This means that the report can be run for a selected list of groups.

To output all models of the selected groups, you define a query. This query is a subordinate query that searches through the selected groups.
Select the section into which you want to insert a query.
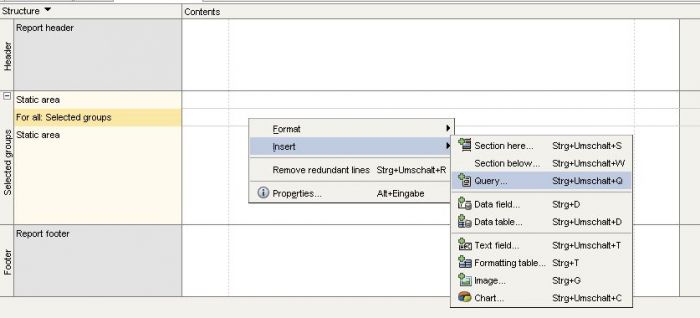
Right-click and select “Insert/Query”. You can set queries for both the repetition area and the static area of each section.
To output all models of the selected groups with their name, you need a query for therepetition area. Enable the "Has repetitions" option.
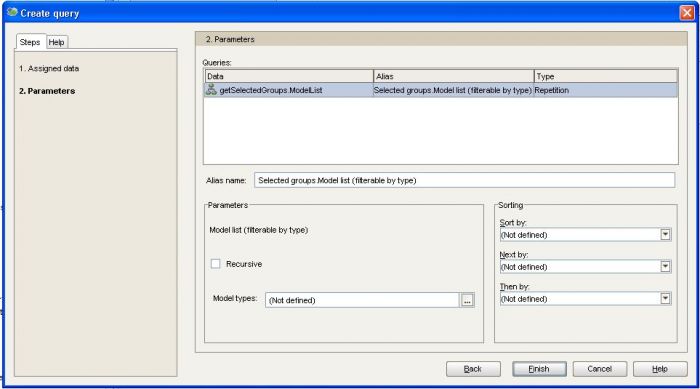
Under 'Available data', select 'Model list (filterable by type)' and click on the 'Add to repetition' button. You can insert only one query into the repetition area.

Click on the "Next" button, select the 'Selected groups.Model list (filterable by type)' query and click on "Finish".
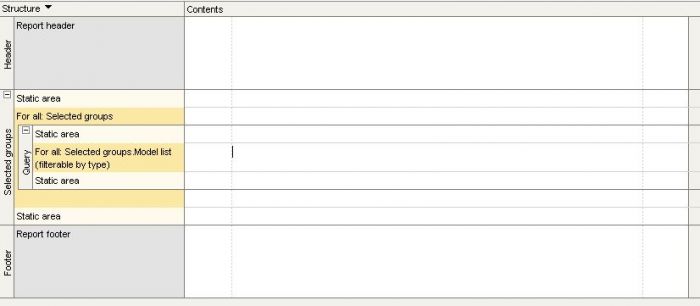
The query will be inserted into the selected area.
To output the relevant names, insert the corresponding data fields.

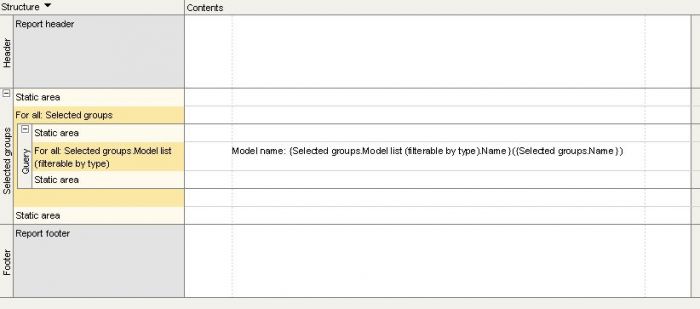
The data field in the 'Selected groups.Model list (filterable by type)'repetion area of the subordinate query should output all model names and their associated group name.
Select 'Name' in the 'Select data' field, click on the 'Next' button and then on 'Finish'. Now the data field shows the text '{Selected groups.Model list (filterable by type).Name}'. To specify the output, the prefix 'Model name:' is added in front of '{Selected groups.Model list (filterable by type).Name}'. To output the name of the group another data field is required. The procedure is the same as the one described above. Here, we insert a data field with the path 'Group – Name'

Click on "Next" and on "Finish".
For a better output, set the second data field in brackets. Now you have finished the first tutorial.
The output of the tutorial shows all selected groups with their models. Here is a sample output:
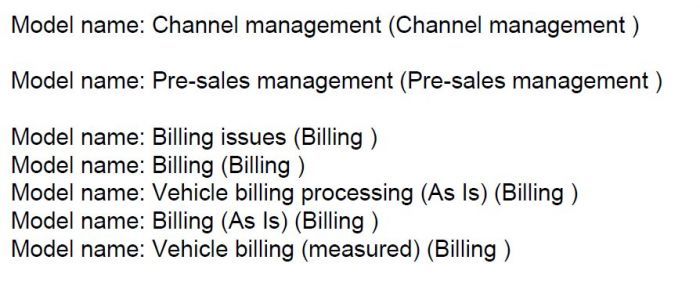
If you have missed the first tutorials, make sure to head over to the table of contents!


Ganesh J on
Hi Eva,
Thanks for the article.
I've been trying to use the WYSIWYG to get some insight into my processes but I cant seem to work out the logic in which to extract the information.
I'm trying to generate a report, where for a given object definition (e.g. position or person type), I get a list of models where the occurrences exist along with the model name and model path. So the context for my report is at the object level.
If multiple occurrences exist, I'd want to display this just once.This is the kicker. So essentially in plain speak - show me which processes a particular role exists and where can I find these processes?
I've tried to generate a report, the report works but it lists all occurrences, so if a role exists in a process 5 times. It lists all the 5 occurrences with the process path.
Here's my report structure
Here's the output
Here's what I Want
I'd appreciate it if you could provide some guidance.
Thanks.
Ganesh